Development Environment Installation Guide
Summary
This guide provides an instruction on how to use the eGovFrame IDE.
Step1. Installation
Download
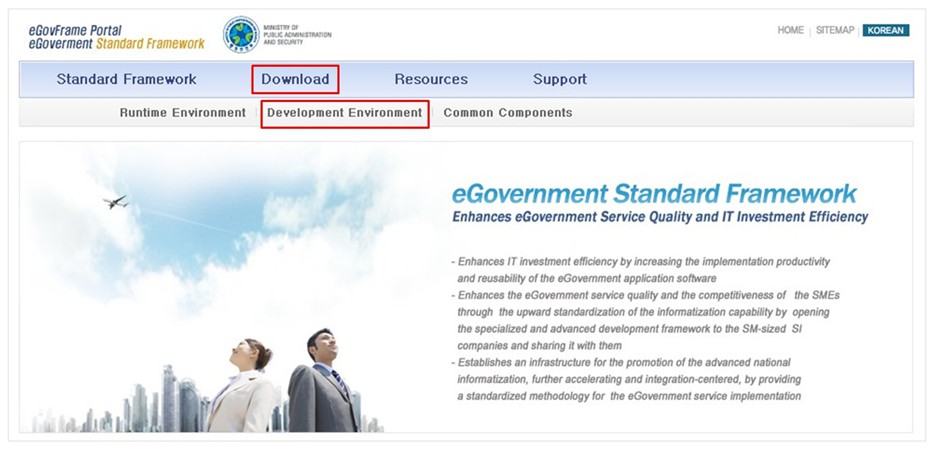
1. Browse to the eGovFrame website (https://www.egovframe.go.kr/eng/main.do),
and choose Download > Development Environment.
2. Choose the eGovFrame2.6 Full verison development environment.

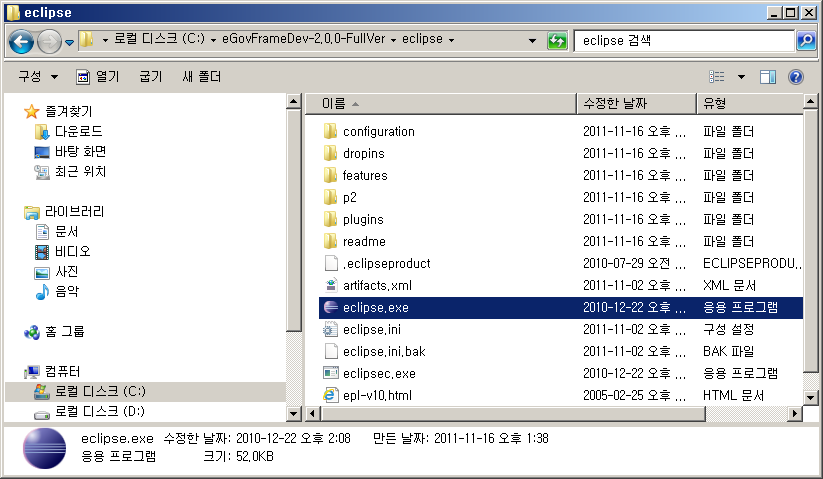
3. Download and unzip the attached file to C:\ or D:\ drive.
Running the IDE
1. Run Eclipse
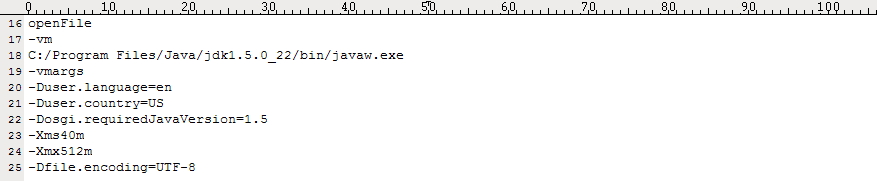
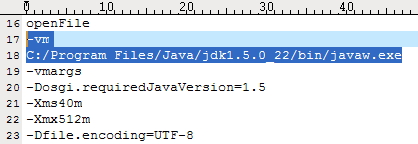
✔ If “Fail to create Java Virtual Machine” error occurs, you must set the JVM path inside the eclipse.ini file within the installed directory. Also, Java version 1.5 or higher must be installed before using the IDE
2. When the eclipse Workspace Launcher pops up, choose the workspace in the downloaded package that is provided by eGovFrame.

✔ The eGovFrame-related settings should be already preset in your downloaded Eclipse, so it is advantageous to stick with the default path (C:\eGovFrameDev-2.0.0\workspace) for smooth running.
Switching the Perspective
1. Once Eclipse launches successfully, ensure that the Perspective on top-right corner is set correctly to eGovFrame.
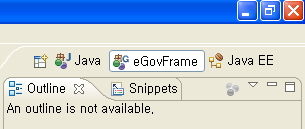
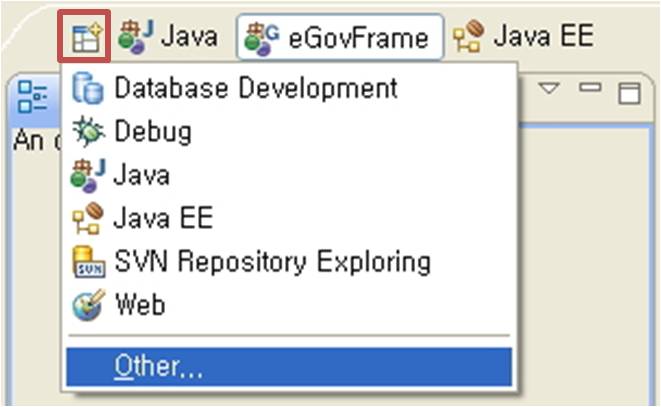
✔ If it is not the eGovFrame perspective, follow the steps below.
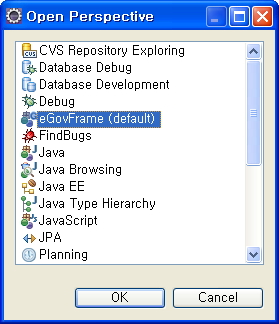
- Click on the upper-left-most corner icon of the Perspectives, and choose “Other… > Open Perspective > eGovFrame”.
Step 2. Create and run a project
Create a project
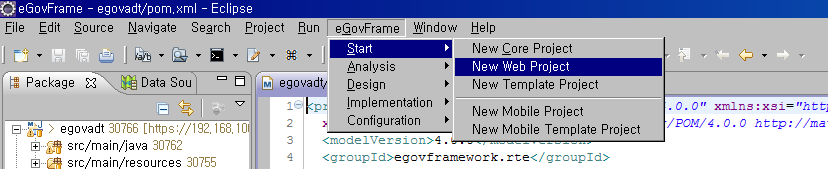
1. Choose “eGovFrame > Start > New Web Project” from the Menu bar.
Or, press Ctrl+N to open the New… Wizard, and choose eGovFrame > eGovFrame Web Project, and click the “Next” button.
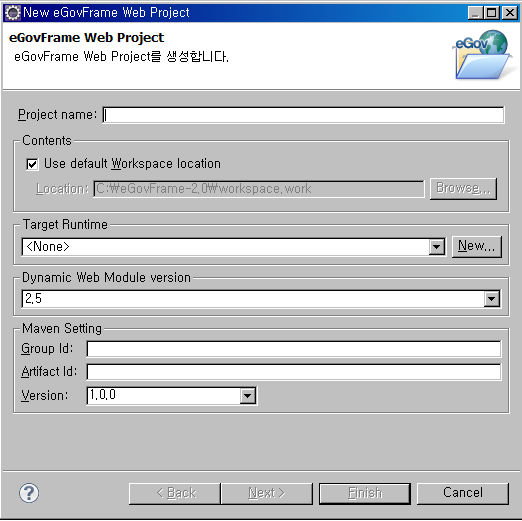
2. Enter the project name and Maven settings, and then click the”Next” button.
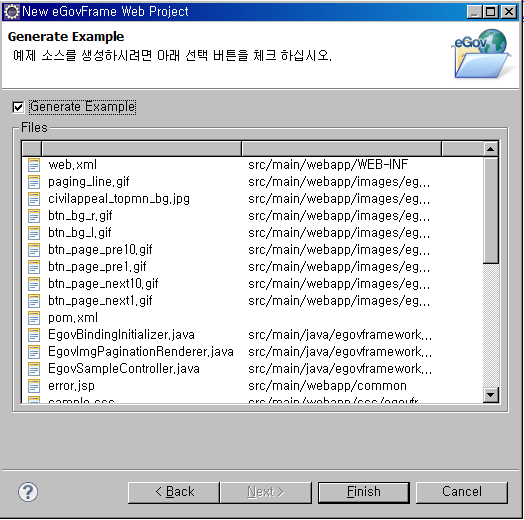
3. Check the Generate Example checkbox, and click the “Finish” button
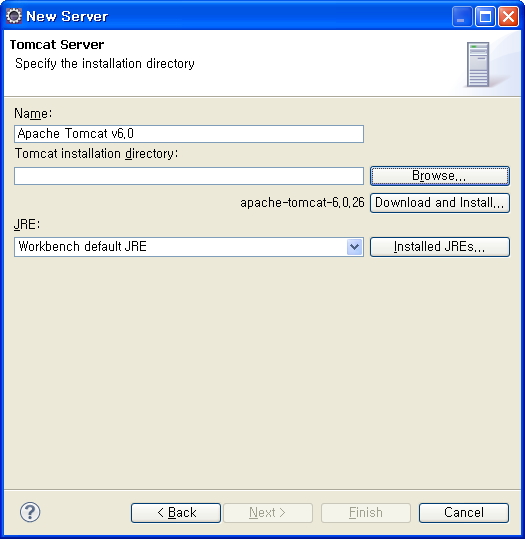
Server installation
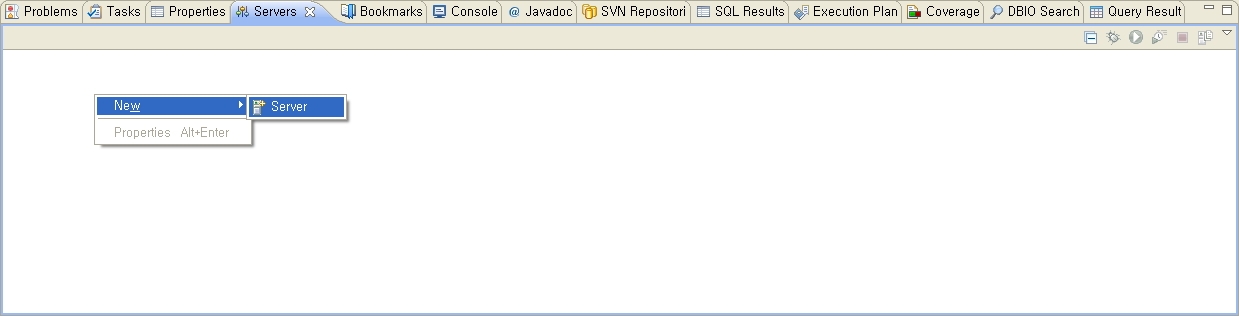
Try installing the Tomcat server. 1. Right-click on the Servers tab on the bottom of the Eclipse application, and choose New > Server
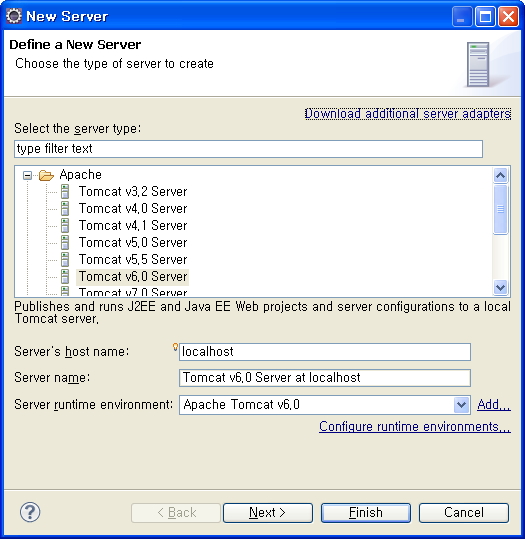
2. Choose Apache > Tomcat v6.0 Server, then click the “next” button, choose the “Download and Install” button to complete server installation.
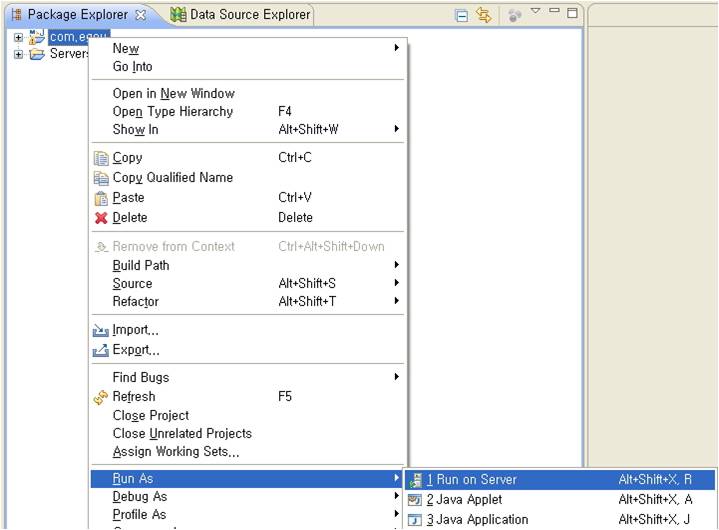
Runnign the project
1. Right-click on the project to run, and choose Run As > Run on Server.
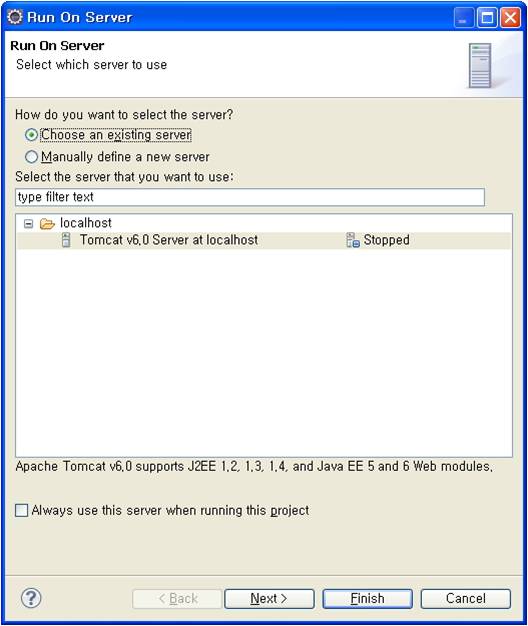
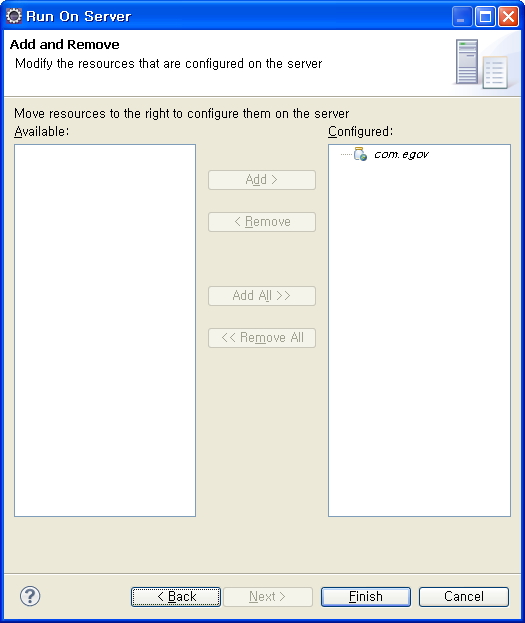
2. Check the “Choose an existing server” radio button, select the server you have installed earlier, and then click the “Next” button to add the project
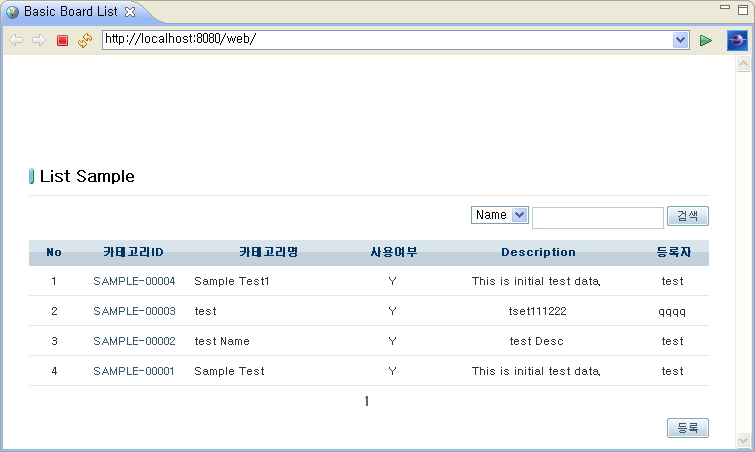
3. Make sure that you get the Basic Board List up and running as below.
✔ If the “Could not open JDBC Connection for transaction” error message pops up, connect to the HSQLDB, referring to the HSQLDB settings guide to connect to HSQLDB.
Runnign the project
Changing the DB information
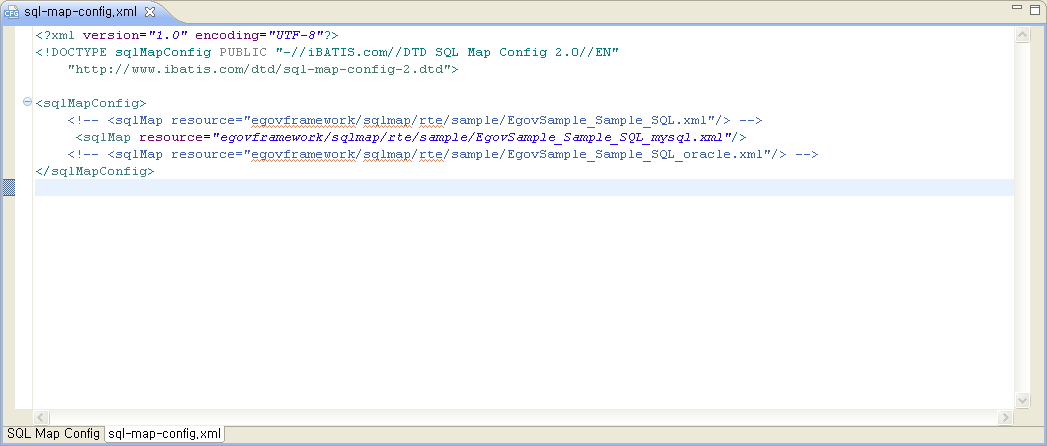
The eGovFrame supports MySQL, Oracle, Altibase, and Tibero databases. This guide will run you through an example of how to configure MySQL database information. 1. Change the sql-map-config.xml file to edit the database info of your project
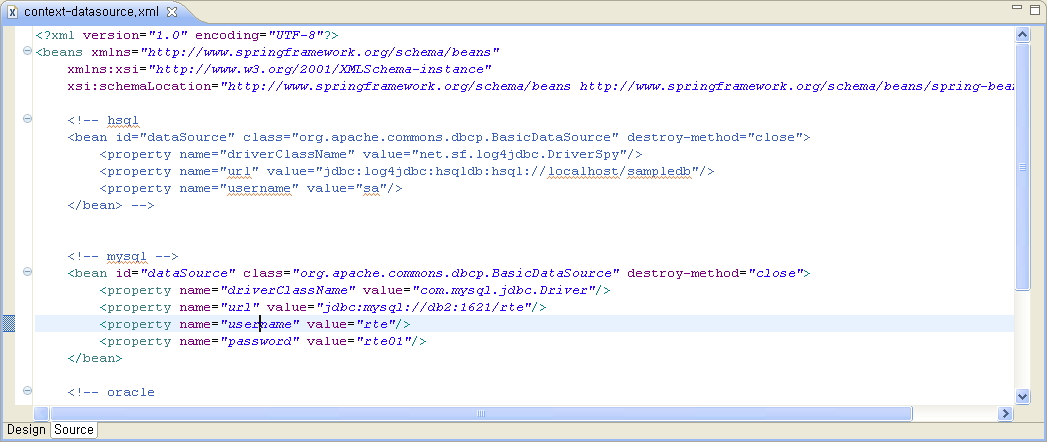
2. Change the context-datasource.xml file as below and enter your database information.
3. Add the following dependency to the pom.xml file as below.
  <dependency>
    <groupId>mysql</groupId>
    <artifactId>mysql-connector-java</artifactId>
    <version>5.1.17</version>
  </dependency>
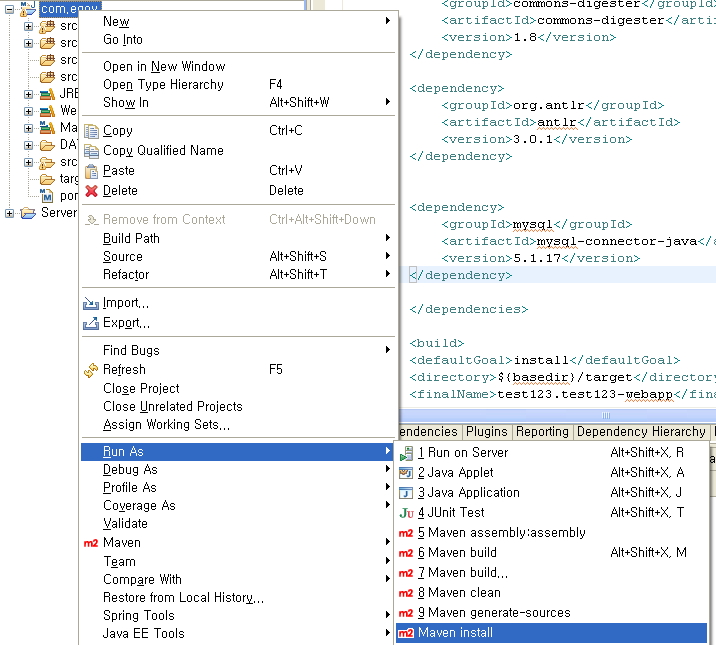
4. Right-click on the project, and choose “Run As > Maven install.
Connecting to the Data Source Explorer
Multi-language support
✔ In order to switch over the language setting to English, modify the eclipse.ini file as below.
-Duser.language=en
-Duser.country=US